Rudy Alberto Makeup Artistry

Rudy Alberto Makeup Artistry

Monday, June 10, 2013

What Essentials should a makeup artist have on their kit?

As a makeup artist my self is very imports that i have good quality products for a flawless application.Also as a makeup artist being sanitary is extremely important and the best to do so is by using disposable items and not double dipping into emollient products.Down below i will share what products you need on your kit from good quality brushes,Skin care,tools and Disposables. Always remember to disinfect your products after each client!


FACE:

    -Good of brushes(Different sizes)
    -Moisturizer
    -Concealer/Corrector
    -Foundation(In a wide range of colors8+)
    -Primer
    -Blush(Different shades 5+)
    -Concealer Palette
    -Translucent Powder
    -Loose powder(Different shades)
    -Facial wipes
    -Blotting paper
    -Facial Tissue(Kleenex)
    -Highlighters
    -Bronzers


EYES:

-Eyeshadow base 
-Neutral eyeshadow palette
-Eyeliners(Black&Brown)
-Mascara(Black&Brown 
-Bright Eyeshadow palette(Fashion shoots)
-Saline eye wash
-Eye drops 
-Brow gel/Wax
-Brow pencil
-Strip false lashes
-Lash Adhesive


LIPS:

-Lip Balm
-Clear Lipgloss
-Lipsticks(different shades) 
-Lip pencils(Coordinating with shades from lip palette)


Disposables:

-Mascara wands
-Wedge sponges
-Cotton swabs(Q-tips
-Cotton balls
-Makeup wipes


Tools:

-Eyelash Curler
-Eyelash applicator
-Tweezers
- brow scissors
-Brow/Lash comb


Accessories:

-Hair pins/Clips(To clip the client hair back)
-Comb
-Breath mints
-Facial Tissue(Kleenex
-Pencil Sharpener
-Oil Blotting sheets 
-Makeup cape-To protect clients clothes(Optional but comes in handy)
-Setting spray(Model in a bottle)
-Brow Spoolie


Tuesday, June 4, 2013

Why Makeup artist aften use powder puffs when applying makeup?

Why use powder puffs?so that you can slide this on your pinky when working on clients. That way, if you need to rest your hand on your client during makeup application, the oils from your fingers won't disturb the makeup

Bold Makeup Lips&Eyes

If you're going out & you want to look you best for an evening dinner or special event.And you in the mood for a smokey eye or a bold lip  remember to: Either play up your eyes or your Lips, never both. If you accentuate both features, you risk looking dated.

If you choose to play up your eyes, you can be as dramatic as you want with eyeliner, shadow & mascara. But stick to gloss or a light lipstick shade for your lips. You want your eyes to 'pop.' But you don't want them competing with your lips.

If it's your lips you want to accentuate, paint on a strong shade & line just your upper lashes with a couple strokes of mascara to finish your eyes. If your eyelids have bluish lines, you can mask that with face powder or concealer, but stay away from colored shadows -- the lighter, the better.

Foudation or concealer first?

What Should i apply first? Concealer or Foundation


Answer:You must apply foundation first, THEN concealer.
If you put foundation AFTER the concealer, you will blend the concealer in and it won't be as effective as a cover up.
You must concealer after, this is because after you have applied the foundation, you can see the necessary areas that need the concealer.Then top off with a dusting of powder to set everything.

Tuesday, February 19, 2013

How to properly apply LIP GLOSS

Does your LIP GLOSS turns white after you apply it? Well here i will share some of my tips on how to prevent that from happening.


• Before applying your LIP GLOSS, it is very important that you exfoliate the lips.You can use honey and sugar for this process. rub it in circular motions to remove dead skin.


• After you done exfoliating your lips apply a "colorless" lip balm to moisturize lips for smooth application.

• If you have the habit of using lip liner then line your lips before you apply the lip gloss. Lining your lips will give it a nice and defined look, it will also cover the flaws of your lips.

• Apply it to just the center of your bottom lip. gently press your lips together to spread the gloss. Take your time and be sure to take the color all the way to the corner of your lips.

• When you apply the lip gloss make sure that you don't apply it thick, just glide it over your lips. If the lip gloss is with a squeezable tube then take a bit of the gloss on your forefinger and apply it across your lips using your finger. If the gloss is with a brush or a sponge, apply it by gliding the sponge or brush across your lips.

•  Use either cotton swab or Q-tip to rub the extra lip gloss that has gone outside the edge of your lips.

• Make sure that you carry the lip gloss with yourself as you would need to apply through out the day.


                                              Extra Tips:

  •it's best to apply lipstick with a Lip brush for more precision

  • Take your time and be sure to take the color all the way to the corner of your lips.

  •  Add a dab of gloss on top of your lipstick for some extra shine. Apply it to just the center of your
   bottom lip

  • Avoid using too much gloss because it tends to get sticky and messy.

  •If your lip gloss is too thick/sticky apply a conditioning lip balm for a sheer effect.


Saturday, January 26, 2013

Tips on how to prevent your eyeshadow from creasing

Are you tired of your eyeshadow creasing and caking? Well i am! Here i will give you some tips on how to create a perfect canvas for your eye makeup to last through out the day.

•Tip#1 Blot: Since most of us have oily lids is always Blot your upper and lower eyelids with a clean, dry tissue or Q-tip to absorb any residual moisturizer or facial oils that could impede the adherence of the makeup to your skin.


•Tip#2 Eyeshadow primer/Base:Apply a thin layer of eye primer up the the crease.Do not go above the crease


 •Tip#3Translucent Powder:Apply a dusting of (translucent powder) to your  eyelids,This will create a dry, smooth base.


 •Tip#4Eyeshadow(Thin layers)Always tap off any excess shadow product before applying shadow to your lids. Start out with a subtle veil of color, building up with another thin layer or two, as needed to prevent caking. Tip: use a flat-head eye shadow brush to apply shadow, working in a stippling motion to set in.

•Tip#5Choose Powder eyeshadow : Instead of cream eye shadow, use powder instead. Creams tend to crease on oily eyelids and oftentimes fade faster than their powder counterparts. You can use cream if you are layering colors, but try to finish off with a powder shadow


 •Tip#6When working with powder Avoid shimmery shadows on the creases and outer corners of the eyes, where creasing is more likely to happen. Hint: for even more crease-proof action, set your shadow with a swipe of translucent powder


 •Tip#7 No Eye cream:When it comes to keeping concealer cake-free, eye creams are a must. But when it comes to keeping shadow crease-free, keep the eye creams away. Eye creams will leave your eyelids oily. When your lids are too oily, the color tends to crease and fade quickly.


Friday, January 11, 2013

What is Vitamin E used for?

 Recent studies show vitamin E has the power to treat everything from cardiovascular disease to eye infections. And, for cosmetic junkies, its antioxidant properties may have the ability to repair sun-damaged skin. Vitamin E is an important and often underrated nutrient that's essential to your health. Read on to learn more.


 Vitamin E is a fat soluble antioxidant vitamin that helps to neutralize potentially damaging free radicals in our body. It exists in eight different forms, d-alpha-tocopherol being the most active form and one of the most powerful biologically active antioxidants. Each form has a different level of potency (functional use) in the body. The tocopherol and tocotrienol subfamilies are each composed of alpha, beta, gamma and delta vitamins having unique biological effects, with generally declining activity; e.g. delta is far less active than the alpha form.

As a supplement, Vitamin E has a number of health benefits for the body. Vitamin E is particularly important for the protection of our cell membranes as well as keeping your skin, heart and circulation, nerves, muscles and red blood cells healthy. Antioxidants such as vitamin E protect your cells against the effects of dangerous free radicals, potentially damaging by-products of your body’s metabolism. Free radicals can cause cell damage that may lead to the development of cardiovascular disease and cancer.

One or more members of the vitamin E family may also reduce cellular aging, inhibit the potentially damaging peroxynitrite radical, inhibit melanoma (skin cancer) cell growth, prevent abnormal blood clotting, synergize with vitamin A to protect the lungs against pollutants, protect nervous system and retina, lower the risk of ischemic and coronary heart disease, lower the risk of certain kinds of cancer, protect immune function and reduce the risk of Alzheimer’s disease, particularly if high doses are taken in combination with vitamin C. Vitamins E, A, and C can all be found in a good liquid multivitamin.

Vitamin E also may block the formation of nitrosamines, which are carcinogens formed in the stomach from nitrites consumed in the diet. It also may protect you against the development of cancers by enhancing immune function. Some evidence links higher intake of vitamin E with a decreased incidence of prostate cancer and breast cancer.

Among other benefits of vitamin E, especially when taken in amounts above the RDA, are:

intakes of vitamin e higher than the daily-recommended requirement have shown that vitamin e may be useful in treating or possibly preventing:

•menstrual pain
•low sperm count
•inflammation of eye tissues
•cataracts
•restless leg syndrome or relief from muscle cramping
•Parkinson’s disease
•rheumatoid arthritis
•asthma
•various diabetes related complications and maybe helpful in treating and preventing diabetes itself
•cardiovascular disease

In terms of skin health and skin care, vitamin e benefits are numerous. In fact, skin care products that contain vitamin e have become an essential part of healthy skin care.

First of all, because of its antioxidant activity, vitamin e is vital in protecting skin cells from ultra violet light, pollution, drugs, and other elements that produce cell damaging free radicals. It is believed that vitamin e is most effective in its natural alcohol form rather than its acetate form where it is a less effective antioxidant. Watch for this in the labeling of skin care products.

The benefits of vitamin e for healthy skin care also include its ability to regulate vitamin a in the body, which itself is important for healthy skin.

Vitamin e added to lotions, creams, and other skin care products, as well as taken orally, plays a role in the anti-aging of skin. It helps skin look younger by reducing the appearance of fine lines and wrinkles. Also, free radicals are believed to play an important role in skin aging and therefore the antioxidant activity is quite valuable for this skin problem.

Vitamin e lotions provide some benefit in preventing and treating sunburns. These lotions protect the epidermis layer of the skin from early stages of ultra violet light damage. Vitamin e preparations also increase the effectiveness of sunscreens. Such lotions do not work immediately. They must be applied about 20 minutes before sun exposure in order to allow the vitamin e to be absorbed deep into the epidermis layer.

Vitamin e can aid in the treatment of various skin diseases or skin conditions. Topical applications such as those used to treat psoriasis is one of the benefits of vitamin e. Orally ingested vitamin e can help treat ery thema (a skin inflammation that results in reddish, painful, and tender lumps).

One of the most important benefits of vitamin e is the prevention of skin cancer. This occurs because of its sun protection quality and of course its powerful antioxidant properties, which help reduce or prevent sun damage.


Other:

•vitamin e products help reduce the appearance of stretch marks
•vitamin e can help prevent the appearance of age spots
•it helps maintain the skin’s oil balance during the cleansing process
•it reduces transepidermal water loss from skin and strengthens the skin’s barrier function

Monday, January 7, 2013

3 Clump Free Mascara Steps


Are you tired of your lashes looking clumped when applying mascara? Well i would love to share 3 steps on how to achieve a clump free lashes.


Step 1: Wiggle the wand left to right at the base of lashes. It's the mascara placed near the roots -- not the tips -- that gives the illusion of length.

Step 2: Pull the wand up and through lashes, wiggling as you go. The wiggling part is key because it separates lashes.

Step 3: In this final step , close the eye and place the mascara wand on top of lashes at the base and pull through to remove any clumps.


Tuesday, December 4, 2012

Cosmetic Sanitation & Disinfection Practice

Sanitation is thee most important practice as a make-up artist. Aside from the obvious reasons: preventing cross contamination, infection, and disease, sanitation practice will ensure the longevity of your cosmetics as well as the health of your clients.


                            Always, disinfect the work surface before unpacking your kit.


 Moisturizers/Primers: Dispense product onto steel palette, wipe nozzle/tip clean with tissue, place cap on product. Use a brush to apply product to client. Discard after 1 year.

Liquid Foundations/Concealers: Dispense product onto steel palette (by pumping, pouring, or dipping cotton swab into product; do not double dip), wipe nozzle/opening clean with tissue, place cap on product. Use a brush to apply product to client. Discard after 1 year.

Cream Foundations/Concealers/Blushes/Gels: Scrape out product onto steel palette with a plastic or stainless steel spatula. Use a brush to apply product to client. Discard after 1 year.

Powder Foundations/Blushes/Eyeshadows: Use a brush to apply product to client. Spray the product with BeautySoClean sanitizer mist. Allow to dry. Optional step: Wipe surface clean with a tissue. Discard after 3-5years.

Loose Powders: Tap product onto steel palette. Use a brush or sponge to apply product to client. Discard after 3-5 years.

Eye & Lip Pencils: Apply product to client. Wipe surface with BeautySoClean sanitizer wipe or dip in 91% isopropyl or higher alcohol; allow to dry. Sharpen pencil. Discard after 1 year.

Liquid/Gel/Glitter Liners: Apply product to onto steel palette. Use a liner brush to apply product to client or dip a disposable liner brush into product, apply to client. Do not double dip; use another disposable applicator, if more product is needed. Discard after 3-6 months.

Mascara: Use disposable mascara wands! Dip into mascara tube, bend the spoolie to a 90* angle, apply product to client. Do not double dip; use another disposable applicator, if more product is needed. Discard after 3-6months.
Lipstick: As a make-up artist, my advice to aspiring make-up artists is to de-tube your lipsticks and organize them into clear stackable jars. It's easiest and quickest to work with when they're in this fashion. All you'll have to do is scrape out what you need, apply onto a steel palette and work from there.
Lipgloss: Use disposable doe foot or lip brush applicators. Dip into lipgloss tube, apply product to client. Do not double dip: use another disposable applicator, if more product is need.

Have a designated zip-lock bag for disposables and dirty brushes.

Once your work is done, disinfect the outside of all products, bags, and pouches as you place them back into your kit.

 However, if you must use alcohol on your cosmetics, be sure to use the highest isopropyl alcohol percentage available to you. This will ensure quicker drying time thus less damage to your cosmetics. For example, if you want to disinfect eyeshadows, simply spray alcohol onto a tissue and wipe clean the surface of the eyeshadow.

Brown Smokey eyes

Combine hues:Do a smokey brown eye by  sweeping a  medium shade all over the LIDS(do no go above your crease) .Blend a darker shade of brown into the CREASE of the eye and beneath lower lash line,Add peach or champagne eyeshadow to your brown bone and eye inner corners < >


*Brown and bronze are versatile-Subtle enough for day and dramatic for night

*Choose your colors:Go for shadows that are two shades darker then your skin tone so they are noticeable.try tan if you are fair,brown if you are medium or rich chocolate if you're dark.For a more natural look,just go one shade deeper than your skin tone.

*Select a finish:Matte is a nice option for day time or work.A metallic(Like bronze or copper) or shimmery color is ideal for an evening look.


Tips for Lip gloss/Lip stick

Are you for the perfect lip application.Rather you applying Lip stick or even lip gloss here is how:


1.Use a lip brush: instead of applying your lip stick or lip gloss from the tube,smooth it on with a brush to spread the color evenly skip lip line and use the brush to perfect the edges of your lips.

2.Make it sheer:If the color is too bold or sticky(Lip gloss) apply lip balm to the lips first.

3.for a stain effect:Lightly apply lip tick then blot.(Preferably use your finger tips) and tap the color.

4.Add lip gloss on top of your lips for a shiny effect.

What to look for when hiring a makeup artist


The most important thing when hiring a makeup artist is their skill level.You need to be aware of which makeup artist will make you look like your self,and which will make you look like a clown.I am pretty sure you ladies wouldn't want to look like clown.Here is how to find the perfect MAKEUP ARTIST:

The perfect Makeup Artist is an expert in cosmetics techniques that work with photos,videos and real life.Regardless of whether you're going to your prom of your wedding,you want to look stunning,both on the day of and on the pictures you will look back on.A reliable makeup artist should be experienced enough to suggest colors and styles that would look on your skin tone.They should also be professional enough to (Interpret) what you need while still listening to what you ask for.
 

Sunday, December 2, 2012

Red lipstick for "Brown Skin women"

Red lipstick is a classic and looks good on any woman once she finds the perfect shade. Alot of "Women of color" are afraid to wear a bold Red lip.Since Red lip is such a bold color make sure to  keep you face as natural looking as possible  and here is how:


Eyes:Since a Red Lip is a very bold always wear "Earth tone" eyeshadows like:Light Brown,Warm brown,Deep brown,Copper,Gold and bronze.Make sure to use a beige eyeshadow to highlight under your brow bone.Lastly line your eyes with black or dark brown eyeliner and apply two coats of mascara and you are ready to rock your red lips.

Lips:Burgundy,Wine Red,Brick Red,Orange and Deep Red.

Cheeks:Deep Burgundy or Bronzer 1 shade darker than your complexion.

*Tip:Keep cheeks natural: Heavy blush clashes with a bold red lip.A natural looking flush is the perfect compliment to a red lip.

Lip color for "Women of color"

 Lipstick colors for "Women of color" are available in a wide range of beautiful shades just like the women who wear them. Lipsticks are an easy and usually inexpensive way to add color to your face, but if you're wondering which shades would flatter your skin tones the most, there are some tips to keep in mind to make sure you select your best colors.Women of color range from light to Dark so here are some colors that might suit your skin tone:


Light Skin

  • Beige
  • Peach
  • Taupe
  • Red 
  • Deep pink

Medium Skin


  • Red
  • Medium to deep pink
  • Bronze
  • Magenta
  • Medium to deep brown
  • Caramel


Deep Skin


  • Deep red
  • Fuchsia
  • Magenta
  • Chocolate brown
  • Bronze 
  • Burgundy
  • Deep Berry
  • Wine


Saturday, December 1, 2012

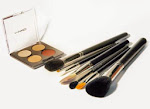
Makeup Brushes and Their Uses


Applying makeup is an art and very few can be good at this. While applying makeup, we often use cotton or
a soft cloth to lighten the effect of foundation or rouge applied on our face, but still we don't get that perfect 
finish. Makeup brushes help in giving the perfect finish to your makeup.  Different makeup brushes have 
various uses and are of many types. They give your makeup a matte finish and blend the foundation to your 
skin tone in such a way that your makeup doesn't look caked up. Using the right makeup brush can give you 
results similar to makeup applied by a professional makeup artist. For daily makeup, you should have the 
essential ones required to apply the most basic types of makeup.
Makeup Brushes
These days in the markets, you can find a range of brushes available belonging to different brands. The 
price of the brushes depends on the brand and quality of the brush. A makeup brush is made up of high-quality fiber or hair. The fibers can either be synthetic or natural, and it should not be rough or harsh on 
the skin. Synthetic ones are easier to clean and last longer than the ones with natural fibers. While 
choosing or buying a makeup brush, keep in mind the type of fiber used. Always opt for good quality 
brushes as brushes with bad-quality fiber might damage your skin.
Their Types and Uses
Makeup brushes are designed according to the facial area to which makeup is to be applied. For example, 
to apply makeup to the eye, you can use a liner brush, a blending brush, an angled brush, or a shadow 
brush. For the lips, you can either use a retractable or a long-handled lipstick brush. For the face, you will
need a foundation, a concealer, a blush, a kabuki, and a powder brush. These brushes are designed with
 tapered, straight, or chiseled tips, and can be used as per the specific look that you want to achieve. The 
types of brushes and their function depend upon the area that they are used to apply makeup. Following 
are the types, depending on the areas of their use.
Face
Foundation Brush
A foundation brush is used to apply liquid or mineral foundation over the face, neck and back. It has flat and 
long bristles that taper at the tips. It can be used for application as well as for touch up of the foundation.
Concealer Brush
A concealer brush is used to apply concealer to areas of discoloration and imperfection on the face. This
brush effectively helps cover blemishes, spots, and imperfect skin tone. This brush is soft and flat with a 
pointed tip and a wide base.
Powder Brush
A powder brush can be used to apply loose powder and shimmer or a bronzer to the face. It has fluffy bristles 
and is soft, full and rounded that helps even out the makeup on the face. It is also used to dust out the 
excessive makeup product and applies the exact amount required.
Blusher Brush
A blusher brush can be either big and fluffy or small and angled. Its fine fibers and round head helps to 
apply blush evenly on the cheeks and cheekbones.
Duo Fiber Brush
It has flat, circular and feathery head which is perfect for buffing and blending colors. It is made up of synthetic
fibers which is used to dust shimmer or bronze to the apples of your cheeks.
Mineral Powder Brush
It is a thick brush that is designed to apply mineral powder evenly to the skin, in circular motions, to get that 
flawless look. It can be used both wet and dry.
Fan Powder Brush
It is designed specially to apply with loose powders and is used to cover fine lines and imperfections on skin. 
It lightly sweeps the powder on the skin and gives a soft and velvety look. This is also used to light the effect 
of excess powder or eyeshadow, hence making an even skin tone.
Face Contour Brush
This is used with gel or powder to give your face a defined shape. Its slant and round shape is perfect for 
highlighting with bronze powder. It gives an angle to your cheekbones and perfectly defines the features of 
your face.
Lips
A lip brush is a fine, soft and tapered brush that can be used to apply lipstick or lip gloss to the lips. It helps 
blend the lipstick with the lip liner to give a smooth and even finish to the lips.
Eyes
Eyeliner Brush
An eyeliner brush is a thin and fine brush with soft bristles that help you line your eyes with precision, along 
with the shape of the eye.
Eyeshadow Brush
To apply an eyeshadow in the right way you will need brushes like the eyeshadow brush, the lid brush, and 
the crease brush. All these are specially designed to apply different shades of eyeshadow to the eyes. Its 
large, flat, short and soft bristles provide a smooth application of the eyeshadow.
Angle Eyeshadow Brush
This is long, round and tapered brush which is used to shade the eye socket.
Blending Eyeshadow Brush
This brush is long with a round head and is used to highlight the eyebrow bone and blend eye colors.
Smudge Brush
This brush is flat and soft in structure and is used to smudge the eyeshadow to give you that smoky look.
Mascara
Mascara usually comes with a sturdy brush that applies mascara evenly to the eyelashes. Some mascara 
brushes also come with small comb like bristles to remove excess mascara from the eyelashes.
Layer Eyebrow Brush
An eyebrow brush gives definition and shape to the eyebrows, giving it a clear and precise arc shape. It 
combs the unruly hair and gives the eyebrows a smooth look.

So, now that you know about the various types of brushes and their uses, do not hesitate to use them 
while applying makeup the next time. Use only the best makeup brushes of good brands to give your 
makeup that perfect finish.
Tuesday, May 8, 2012

Eye makeup


I am so exited to share this product with you guys! for the past years i been looking for the perfect "Brown" eyeshadow for an everyday look that will also compliment my skin tone.As i go on the MAC website i was searching and searching until i came across this beautiful brown eyeshadow.Besides the color! the name also caught my attention witch is "Brown Script" described as a warm chestnut brown(Matte) this color is one of my favorite browns so far.

Monday, May 7, 2012

What eye makeup colors look good on Brown skin?

The colors that look best on woman of color are:Browns,Golds,Copper,Bronzes,Plums,Navy blue,Purple,Gun metal green and Beige. Beige look best to highlight under the brow bone.For example if you want a sexy smokey eye not as dramatic you can simply use a medium metallic brown all over your eyelid evenly and smoothly padding and not spreading.Then you would take a darker color that compliments your lid color.I personally prefer a dark brown color for the  crease ,when blending the crease color  make sure to blend from the outer corner of the eye towards your nose half way of your eyelid.Where your eyelid creases.